| Delphi Clinic | C++Builder Gate | Training & Consultancy | Delphi Notes Weblog | Dr.Bob's Webshop |
| Delphi Clinic | C++Builder Gate | Training & Consultancy | Delphi Notes Weblog | Dr.Bob's Webshop |
| ||||||

Advantage Database Server and DataSnap
In this article, I will demonstrate that DataSnap, the multi-tier application framework found in the Enterprise editions of Delphi and C++Builder, is not limited to the databases and data access technologies found in these development environments, but can also be used and integrated with the Advantage Database Server and Advantage TDataSet components.
In order to demonstrate this, I will extend an existing “event registration" application by exposing the data using a DataSnap Server, and also allowing special users to make changes to this data (using the DataSnap role-based authentication functionality on top of the Advantage database server).
DataSnap Server
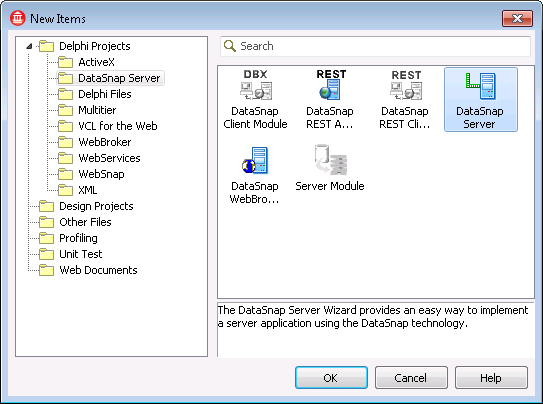
In this article, I’m using Delphi XE Enterprise, but similar steps can be done using C++Builder Enterprise. Once Delphi is started, do File | New – Other, and in the Object Repository locate the DataSnap Server category with the DataSnap Server wizards. There are three possible wizards we can use, producing web-based or stand-alone DataSnap Servers. There are basically two kinds of protocols that the DataSnap Servers can use: HTTP(S) and TCP/IP. HTTPS is supported only by creating an ISAPI DLL deployed on IIS (with an SSL certificate), while HTTP(S) and TCP/IP can also be secured using DataSnap filters. TCP/IP is faster than HTTP, so for the example DataSnap application I decided to use the standard DataSnap Server wizard, producing a stand-alone DataSnap Server application (with a choice between HTTP and TCP/IP as transport protocol in one of the wizard pages).
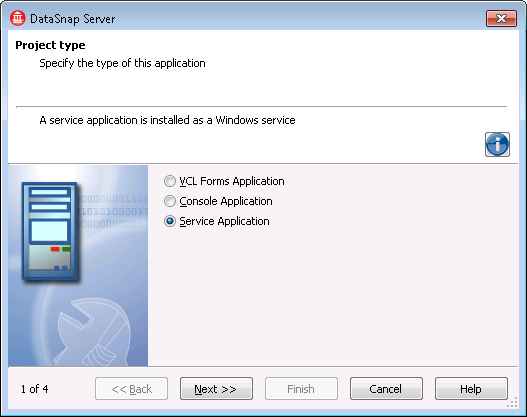
The wizard offers three choices for our DataSnap Server application. A VCL Forms Application is the easiest one to start with, but not very practical when it comes to deployment. The Console Application isn’t even as intuitive to use as the VCL Forms Application, but the best choice at this time – also when it comes to deployment – is the Service Application. A Windows Services can be installed and configured to start automatically (as soon as the machine itself is started), without the need to manually start the application.
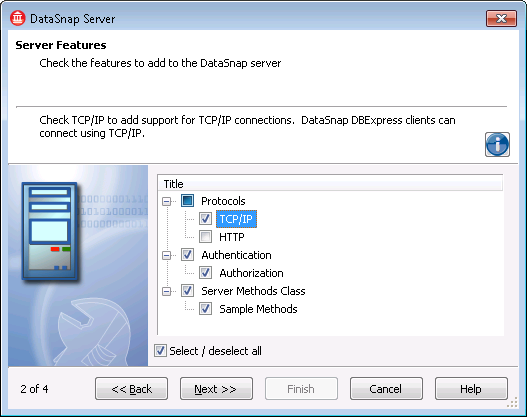
The next page of the Wizard can be used to specify the communication protocol. We have a choice between HTTP and TCP/IP. Since the latter is much fast, we only need TCP/IP as protocol.
Authorization (who is using the system?) and Authorization (what is this user allowed to do?) are also useful features, so we should check them as well.
Finally, we need some place to specify and store our Server Methods (inside a Server Methods Class), and it doesn’t hurt to include a few sample server methods either.
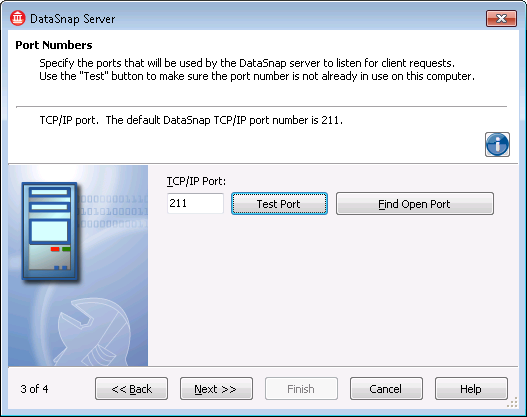
The next page of the Wizard can be used to specify the port to use for the TCP/IP transport. The default port is 211, which is fine for this demo application. Note, however, that in real-world situations you may want to use a different port (to make it harder for uninvited visitors to “guess" the TCP/IP port that your DataSnap Server is listening to). Also, do not forget to open up your firewall, and your router or gateway’s firewall to allow incoming TCP/IP traffic on this specific port, otherwise the DataSnap Server may get very lonely without any incoming messages.
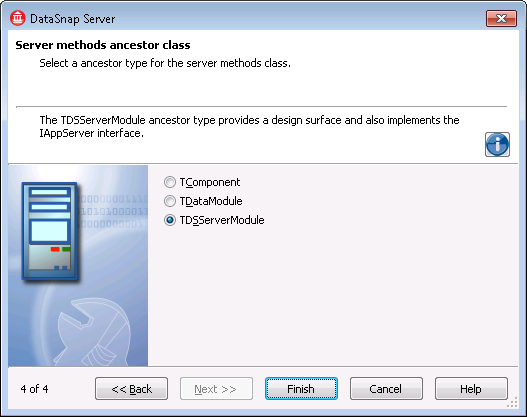
The next page of the DataSnap Server wizard can be used to select the choice for the Server Methods class. By default, a simple TComponent base class is suggested, but we can only implement server methods as part of this class, and cannot expose TDataSetProviders (a powerful functionality of DataSnap). For the latter to work completely, we should select not just the TDataModule, but in fact the special TDSServerModule base class (which implements the IAppServer interface for us).
If we click on Finish, a new DataSnap Server project is created. We can save the project as RegistrationServer, containing ServerContainerUnit1.pas and ServerMethodsUnit1.pas.
DataSnap Container Unit
The ServerContainerUnit1.pas contains a TServerContainer1 class with four components placed on it: TDSServer, TDSServerClass, TDSTCPServerTransport and TDSAuthenticationManager.
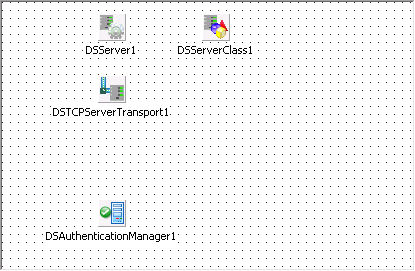
The TDSServer component is the “engine" of the DataSnap Server application. With methods to explicitly Start, Pause and Stop the engine. By default, the AutoStart property is set to True, to ensure that the engine is started as soon as the application itself is run. In our case, this means that the DataSnap engine is active as soon as the service application is started.
The HideDSAdmin property of the TDSServer component is set to False by default, but we should change that to true when it’s time to deploy the application.
The TDSServerClass component is used to tell the DataSnap Server which server class to generate for the incoming requests, using the OnGetClass method. The LifeCycle property can be set to Server, Session and Invocation to control if the specific server class is generated only once (for all incoming connections), once for each session, or once for each request. The default is set to Session, which means the server class instance can store state information (like the current record), but this does result in a less scalable solution. With a LifeCycle set to Invocation, the DataSnap application can handle far more requests, but this may require a bit more work (which falls beyond the scope of this example, but is covered in my DataSnap Development Essentials courseware manual for example).
The TDSTCPServerTransport component is responsible for the TCP/IP communication between the clients and the DataSnap server application. We can configure the BufferKBSize property, by default set to 32, to increase performance when passing large sections of data (like big datasets). Note that the buffer size should be increased at the client side as well for best effect. The TDSTCPServerTransport component also has a property AuthenticationManager that points to the TDSAuthenticationManager component
The TDSAuthenticationManager component is responsible for both the Authentication (who is the client connecting to the server) and the Autorization (which server classes and/or serve r methods can be executed by this user?). We can control these by implementing the OnUserAuthenticate and OnUserAuthorize event handler (by default they both return True, meaning that anyone can get login and has access to all classes and server methods). We’ll get back to this option later in the article, when the Server Methods are implemented.
Before we continue with the DataSnap Server Methods Unit, we should first take a closer look at the database tables in side the Advantage Database Server that we want to use.
Registration Table
Let’s take a look at the Event Registration table that I’ve been using for a number of my Delphi and Advantage Database Server events in The Netherlands in the past few years. Generally, the table had the following layout, as shown in the Advantage Data Architect here:
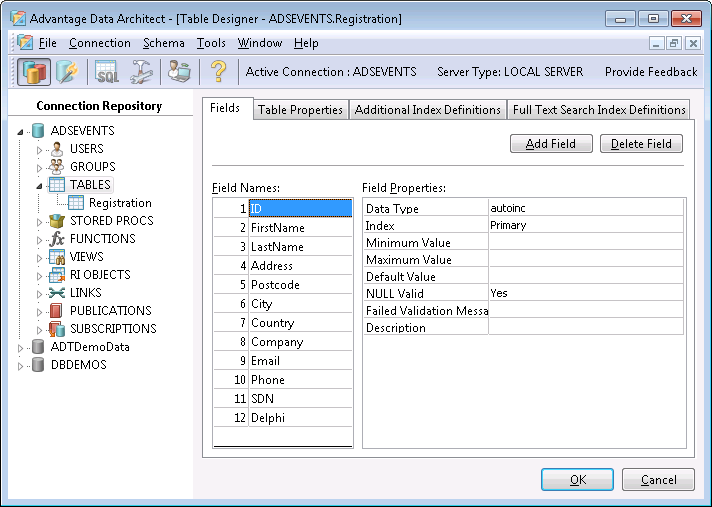
This table holds the information for one specific developer, attending an event. However, for each event, I would need to start with an empty table again. And some developers would need to re-register for new events (even if they might have been registered, and therefore known, for a previous event). In order to extend the possibilities of the registrations, and to allow people to “login" and register for another event without having to fill in all fields from the registration table again, I decided to extend the data model with two other tables: Events and EventRegistrations (the initial Registration table could have been renamed to Developers, but I decided to keep the old name, so old applications wouldn’t break).
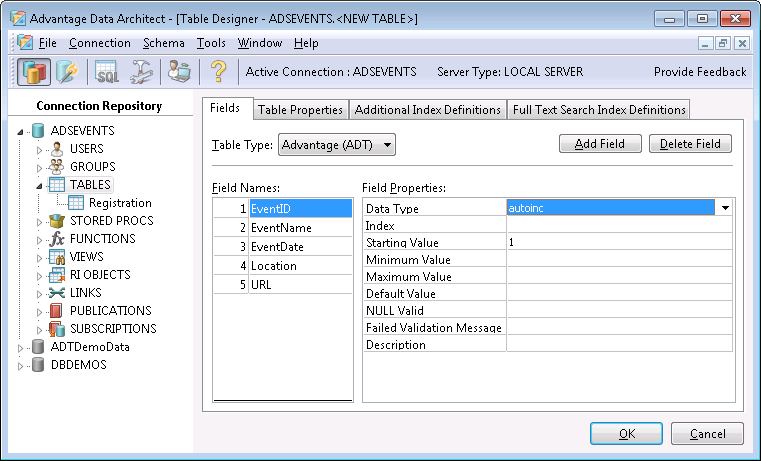
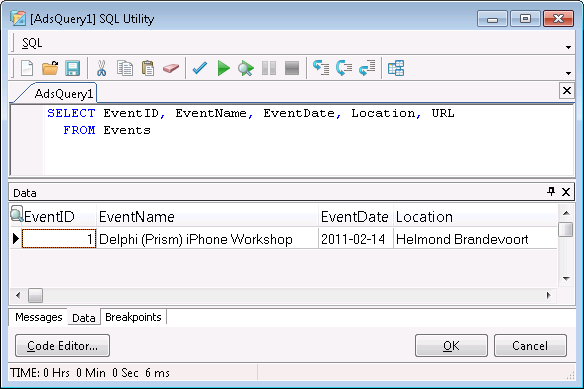
The Events table holds information about the specific events that the developers want to register to, like my Delphi Workshops in The Netherlands, or Advantage Database Server seminars for example. This table should hold fields for the name of the event, the date, location and optionally a URL with more information.
Since a registered developer can attend one or more events, and an event is usually attended by one or more attendees, we need a N:M table to connect these two tables, which is done in the table EventRegistrations. This table contains only two fields: ID from the Registration table and EventID from our new Events table.
Assuming we have one table with registered developers of a single event, we can now create a new record in the Events table for that (past) event, as well as a set of records in the EventRegistration table to hook up all registered users to that event. I leave that as exercise for the reader, but it was required to get the next example code to work and return a useful result for the demo.
ServerMethodsUnit
Time to move to the Server Methods Unit, where we can finally add some data access components to connect to the Events data dictionary and the tables inside it.
We start by placing an TAdsConnection component on the TServerMethods1 class. Since we created a Data Dictionary called Events, we can use the AliasName property to connect to this Data Dictionry on the local machine (this assumes that the DataSnap Server and the Advantage Database Server run on the same machine, but we can also connect to a remote database of course).
After the AliasName property has been set, I always also set the LoginPrompt property to False. Note that this is not really required, since the LoginPrompt property has no effect when it turns out that the database doesn't need a password (quite handy, because it doesn't ask for a username/password when none is needed).
Finally, we can check if we can connect to the tables by setting the IsConnected property to True.
The TAdsConnection component has a few more interesting properties, worthy of a mention. I often get in trouble when I open a Delphi project from machine X on machine Y, and the database (from machine X) cannot be found on machine Y. Using other data access technologies, with an active table, query or database connection at design-time, this usually means that I have to wait for a connection timeout before I can continue. With the TAdsConnection component, the value of the IsConnected property – used at design-time - doesn't have to be stored. The property StoreConnected can be used to control the saving of the IsConnected value to the DFM file. Quite handy, since this will avoid these time-out errors. Note that we need to set StoreConnected to False (since it's set to True by default), but at least we only need to do that once, and we don't need to remember to close any database connections before we save or close the project.
Another helpful property is the CompressionType property, by default set to ccAdsCompressionNotSet, but we can also assign values ccAdsCompressionInternet (to indicate that data transfer to the internet should be compressed) or ccAdsCompressionAlways (to indicate that all data transfers should be compressed).. Compression results in less data that needs to be transferred, but takes a little longer to process (the data needs to be compressed and decompressed). For that reason, it's not very useful to use compression on a Local connection. For real Client/Server of web application this is a nice property to help minimize the bandwidth usage.
The TAdsConnection component also has UserName and Password properties, in case the database needs a connection. We can also pass this information using the OnLogin event handler, where we can pass the UserName and Password that they user has entered on screen for example.
Another nice property is ReadOnly, which we can use in situations where it's clear in advance that no changes to the data should (and will) be made, but only read (SELECT) operations are allowed. By setting the ReadOnly property to True, we are assured that no UPDATE, INSERT or DELETE commands will be performed, and that the data will indeed not change.
TAdsTable: Events
The TAdsTable component can be compared to the good-old BDE TTable component, for those readers who still use the BDE (and should really migrate away from it).. When using a TAdsTable component, we should point the AdsConnection property to a TAdsConnection component, and then we can select a suitable table by picking one from the list we get for the TableName property. The Active property works just like the normal TTable, and can be used to view live data at design-time.
For our example, we should select the Events table as value for the TableName property for a TAdsTable component, that we can give the name atEvents.
To return the contents of this TAdsTable from the server methods unit in the DataSnap server to the DataSnap clients, we can write a simple server method, implemented as follows:
  function TServerMethods1.GetEvents: TDataSet;
  begin
    atEvents.Open;
    Result := atEvents;
  end;
All we need to do is open the atEvents TAdsTable (pointing to the Events able) and assign it to the result of the GetEvents server method. This will return the dataset in a way that it can only be read and not modified (since it’s the result of a function), which is ideal to produce just a list of events.
Query Master-Detail
Another, and slightly more complex, example involes a master-detail query. This time, we start with a TAdsQuery component, the counterpart of the BDE TQuery, and ideal replacement if you still use the BDE for example. The TadsQuery needs to be hooked up to the TAdsConnection component, using the AdsConnection property.
The TAdsQuery component has an SQL property that can be assigned a SELECT command, like the following to select the EventID, EventName, EventDate, Location, and URL from the Events table.
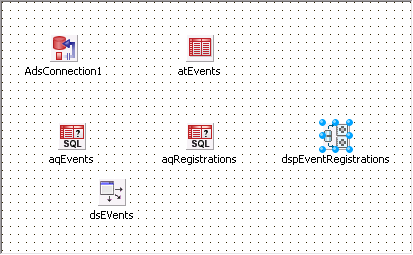
If you’ve placed a TAdsQuery component on the Server Methods unit, you can rename the TAdsQuery to aqEvents, and set the IndexFieldNames to EVENTID. We also need a TDataSource component, named dsEvents, connected to the aqEvents, in order to hook up the detail table in a minute.
We can then place a second TAdsQuery component on the Server Methods unit. Where the master is used to return all events, in the aqEvents, the second query will be the detail, returning all registered users for the (master) event.
We should give the second TAdsQuery the name aqRegistration, and can write the following SQL command to return the ID, FirstName, LastName, Address, Postcode, City, Country, Company, Email, Phone, SDN (membership number) and Delphi (version) from the Registration table, connecting the two ID fields (from the Registration table and the EventRegistration table), using the EventID field from the EventRegistration table to filter out the events based on the EventID parameter, which can be obtained from the master aqEvents query.
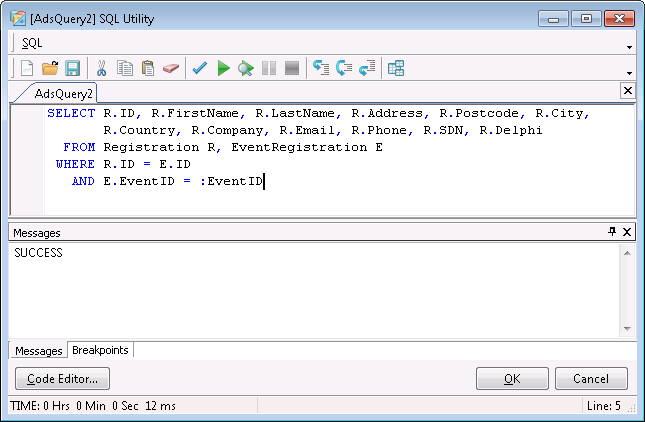
In order to get the value of the :EventID parameter, we must connect the aqRegistrations’ DataSource property to the dsEvents TDataSource (which in turn was connected to the aqEvents TAdsQuery, remember?).
The single parameter EventID will automatically be filled in with the current value of the EventID field in the master query aqEvents, selecting only the records from the detail query aqRegistration that belong to that specific event.
Finally, we need a TDataSetProvider to expose the master and detail query records from the Server Methods unit in the DataSnap server to the DataSnap clients. Give the TDataSetProvider the name dspEventRegistrations, and connect its DataSet property to the aqEvents master query (which will automatically also include the aqRegistrations detail records in a so-called nested dataset).
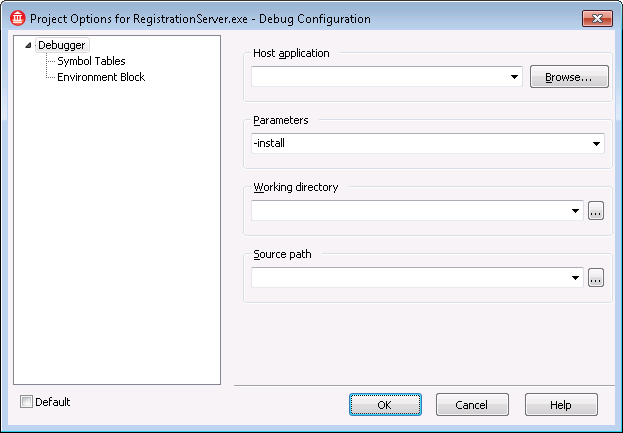
We can now compile the DataSnap Server project, and run it. However, since the project is a Windows service project, running it will have no effect. Instead, we should run it with the –install command-line option in order to install it as a Windows service. The easiest way to do this from the Delphi IDE is to go to the Project Options dialog, and specify the –install Parameter.
Now, when we run the service, it will just install it. After a message from the firewall, you will get the confirmation dialog that the service is installed.
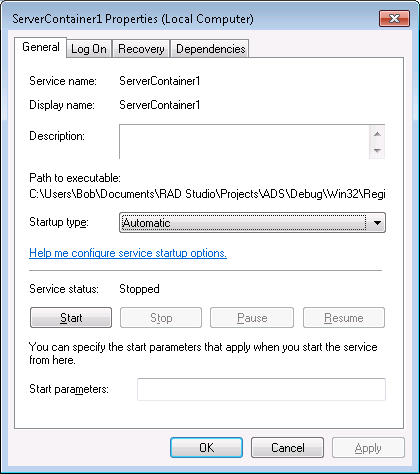
Being installed, the service doesn’t start automatically. We need to go to the Computer Management Console to explicitly start the service for the first time (or just reboot the computer, since the startup type is set to Automatic).
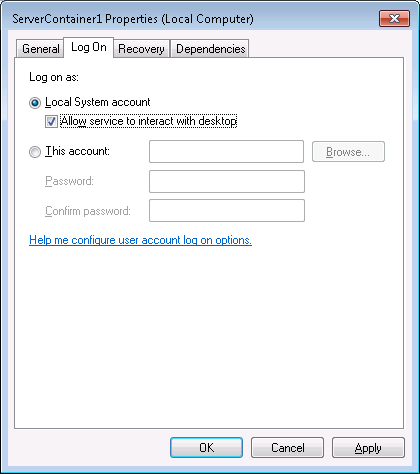
However, before we start it, we can enable the “allow this service to interact with desktop" option, which will be a big help if we want to display error messages (although these are best logged using the third-party tool CodeSite, which is now included with Delphi XE as CodeSite Express edition).
Finally, we can explicitly start the DataSnap service, and can prepare to build the DataSnap client project to retrieve and work with the data from the Advantage database.


