| Delphi Clinic | C++Builder Gate | Training & Consultancy | Delphi Notes Weblog | Dr.Bob's Webshop |
| Delphi Clinic | C++Builder Gate | Training & Consultancy | Delphi Notes Weblog | Dr.Bob's Webshop |
| |||||||
See also: Generating documentation in JBuilder 2

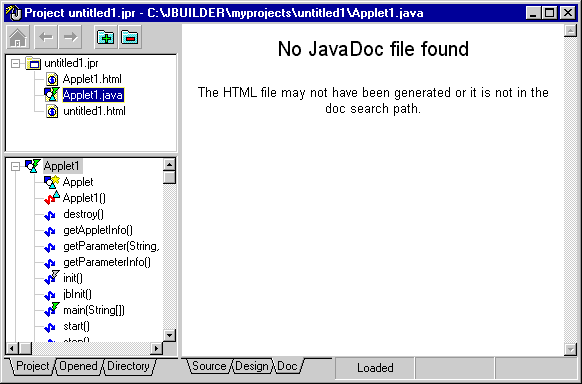
No JavaDoc file found !
What goes wrong here?
Well, a couple of things. JBuilder uses documentation files generated by a program called JavaDoc. JavaDoc is one of the JDK command-line tools. It can be found in the Java\Bin folder in your JBuilder folder. JavaDoc automatically generates HTML documentation pages from your Java source code and comments. The entire Java API documentation is generated this way. We can include some tags in our comments that will be used by JavaDoc to create the document files with more information. You need to use the following style of comment for JavaDoc to construct the HTML files:
/** Comment here ... */.
The following tables shows the tags that can be used in your comments.
| Tag | Description |
|---|---|
| @see classname | Adds the text "See also" with a hyperlink to classname to your class. |
| @see fully_qualified_classname | Also adds a hyperlinked "See also", but this time you need to use a fully qualified class name. |
| @see fully_qualified_classname#methodname | Adds a hyperlinked "See also" to the class, pointing to a specific method in the name. |
| @version text | Adds a version text that you provide. This text can be a number or text. |
| @author name | Adds an entry with the author name. |
| Tag | Description |
|---|---|
| @param parameter_name description | Used to show which parameter the method accepts. |
| @return description | Describes what the function returns. |
| @exception fully_qualified_classname description | Used to add a "throw" entry that describes what type of exceptions this method can throw. |
| @deprecated explaination | Tells the method is deprecated. |
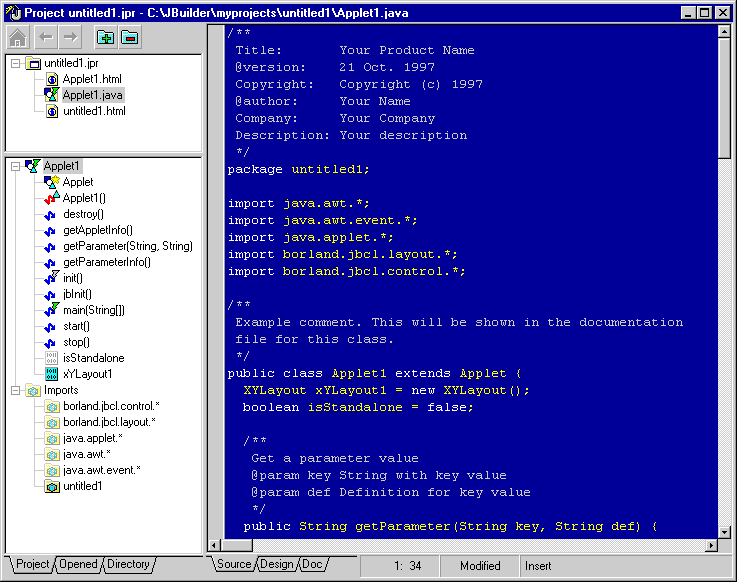
I used the standard comments generated by JBuilder and turned them into the special comments that JavaDoc uses:

Added special comments section to source code
Let's take a closer look at the JavaDoc command. If we type in JavaDoc at the MS-DOS prompt we get the following output:
  AppAccelerator(tm) 1.1.2.018 for Java (JDK 1.1), x86 version.
  Copyright (c) 1997 Borland International. All Rights Reserved.
  javadoc: No package or classes specified.
  usage: javadoc flags* [class | package]*
          -sourcepath <path>  Colon-separated list of source-file directories
          -classpath <path>   Synonym for -sourcepath
          -d <directory>      Destination directory for output files
          -version            Include @version paragraphs
          -nodeprecated       Exclude @deprecated paragraphs
          -author             Include @author paragraphs
          -noindex            Do not generate method and field index
          -notree             Do not generate class hierarchy
          -public             show only public classes and members
          -protected          show protected/public classes and members (default)
          -package            show package/protected/public classes and members
          -private            show all classes and members
          -J<flag>            Pass <flag> directly to the runtime system
          -encoding <name>    Source file encoding name
          -docencoding <name> Output encoding name
Make sure JavaDoc is in your path.
The easiest way to achieve this is to run the setvars batch file in your JBuilder\Bin folder.
The first parameter is your home folder for JBuilder.
So if you have installed JBuilder in C:\JBuilder you would have to type the following command: setvars c:\jbuilder.
This takes care of all your environment settings like path and classpath variables.
Remember this settings are only valid for your current DOS session.
As you can see JavaDoc accepts various flags and the name of your java source file.
Most of the flags are for including or excluding specific tags in your comments.
Because we have run the setvars batch file our classpath is already set.
The most interesting flag for us right now is -d <directory>.
Here we can specify the output folder for the generated HTML files.
To keep everything organized I created an extra folder in the JBuilder\Doc folder named MyProjects, but you can of course create a folder with any name you like and at any place where you like. As long as you remember this folder, because you need to tell JBuilder later on where to search for the doc files of your source code.
First we generate the source files.
Go to the folder where you saved your Java source file.
Then type in the following command: javadoc -d c:\jbuilder\doc\myprojects\ Applet1.java.
Replace the folder after the -d flag with your documentation folder and Applet1.java with your source file.
If everything goes well you should see something similar to this:
  AppAccelerator(tm) 1.1.2.018 for Java (JDK 1.1), x86 version.
  Copyright (c) 1997 Borland International. All Rights Reserved.
  Generating package.html
  Generating documentation for class untitled1.Applet1
  Generating index
  Sorting 10 items...done
  Generating tree
Now we are getting somewhere!
We made our documentation file.
All we have to do right now is tell JBuilder where to find it.
In your JBuilder\Bin folder is a JBuilder.ini file.
Open this file in Notepad or any other ASCII-editor.
Find the line starting with DocPath=.
Add your documentation output folder you just created to this search path.
In my case I added this: ;..\doc\myprojects\.
You have to restart JBuilder to make sure this change takes effect.
After you restarted JBuilder, you can reopen your project. Select your Java source file in the AppBrowser. Click on the Doc tab in the Content pane. Et voilá your documentation file is shown. But as you can see, JBuilder can't find all the image files necessary for the documentation file. To fix this you need to add a image folder to your documentation folder with a couple of required images. The easiest way to achieve this is, is to copy the image folder from the Doc\KLGroup\BWT\ folder to your documentation folder. You get some images you don't need but you also get all the images you do need. Just to be complete; these are the files you need: methods.gif, constructors.gif, blue-ball-small.gif, blue-ball.gif, class-index.gif, constructor-index.gif, cyan-ball-small.gif, cyan-ball.gif, error-index.gif, exception-index.gif, variable-index.gif, variables.gif, yellow-ball-small.gif, yellow-ball.gif, magenta-ball-small.gif, magenta-ball.gif, method-index.gif, package-index.gif, red-ball-small.gif, red-ball.gif, green-ball-small.gif, green-ball.gif, interface-index.gif.
After you copied this folder, this is the final result:
It takes some hassle, but it works. If you intend to generate a lot of documentation files, you may want to create your own batch file, which sets all the environment setting and calls JavaDoc with the right output folder. You can then include your source file as parameter for the batch file.