| Delphi Clinic | C++Builder Gate | Training & Consultancy | Delphi Notes Weblog | Dr.Bob's Webshop |
| Delphi Clinic | C++Builder Gate | Training & Consultancy | Delphi Notes Weblog | Dr.Bob's Webshop |
| |||||||
Create and use documentation for your own classes in JBuilder 2
In a previously published article I explained how to generate documentation for our Java classes, and how to use them in JBuilder 1.
But lately I have received e-mails with requests to show how to do this in JBuilder version 2.
Because a couple of things changed in JBuilder 2, the previous way of generating and using documentation, cannot be done in JBuilder 2.
I also received some e-mails describing the new way to generate your documentation and use it (I like to thank you for your responses!).
This article will show you how to generate your documentation files, using the undocumented JBDoc Wizard.
I will also show you how to make a library that will add the path to your documentation files to your project.
Let the Doc tab work !
It is still possible to create documentation for our Java classes, using the JavaDoc utility provided with the JDK (later on we will use the JBDoc Wizard).
Go to the command line and invoke the JavaDoc executable.
Look at the previous article for parameters and their meaning.
Once the documentation files are made, we can add a reference to the folder with the documentation to our project.
JBuilder 2.0 uses libraries to assist us in using different packages and classes.
Each library contains the folder with the classes, source files, and documentation files.
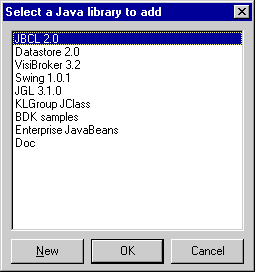
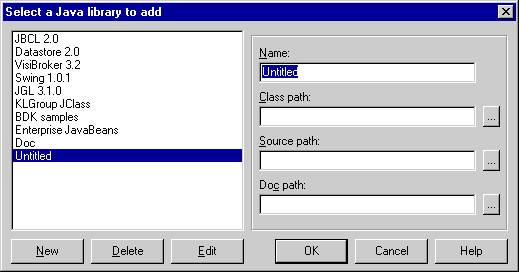
So once we created the documentation, all we have to do is to create a new library for our project, and add the folder with the documentation files to the library.
Here are the steps:


JBDoc Wizard
This section describes an unsupported wizard in JBuilder 2.
So if it doesn't work for you, don't complain at Inprise, because this wizard isn't supported.
But for me it worked just fine, so we shouldn't have too much problems.
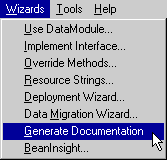
As we have seen it is possible to use the JavaDoc executable from the command line to generate documenation. But wouldn't it be nice, if we could generate our documentation from within the JBuilder IDE? Of course! And it can be done. JBuilder contains a complete, but undocumented and unsupported, documentation generation wizard. This wizard, once installed, will show up in the Wizards menu, and can be invoked from the menu.
Install the wizard

Generate documentation menu item added
Using the wizard
Let's open a project file we want to generate documentation for.
Then activate the Generate documentation wizard:

Generate documenation wizard
The wizard has to know three thing before it can start generating the documenation.
Two are already filled in for us: The package to document and the Output directory.
JBuilder already filled in the name of the package of the classes available in our project.
If this isn't the right name, or we want to generate a different package, we can type in a different package name.
On the second line we tell the wizard to ignore certain sub-packages in the package hierarchy, when creating the documenation.
We will leave this line blank most of the time.
And finally me must type in the name of the Output directory.
The suggested name, <our JBuilder folder>\doc\borland\reference, is a good name.
By using this folder, JBuilder will be able to look for documentation files for packages like JBCL, and java.*, from within your documentation classes.
Click on the OK button to start the generation. The label of the button will change to Close, and a status line is showing the progress of the documentation process. Don't get impatient, because this process, isn't a quick one. Once the documentation is generated, the dialog box will disappear.
We now must add the Doc path to a library that will be used by our project, just as with the JavaDoc generated documentation. Clicking on the Doc tab of a Java source file, shows the new generated documentation. (Trouble loading the documentation? Try to quit and restart JBuilder.) We see that the format of the documentation is different from the one generated by JavaDoc. The wizard uses the same format as the documentation for the borland packages. And because the files are in the doc\borland\reference folder, we can click to parent classes, in other packages, methods, and many more.
Default Doc path
If we will generate all the documentation to the doc\borland\reference folder, we can define a library, with a reference to this folder, and use this library in every project.