| Delphi Clinic | C++Builder Gate | Training & Consultancy | Delphi Notes Weblog | Dr.Bob's Webshop |
| Delphi Clinic | C++Builder Gate | Training & Consultancy | Delphi Notes Weblog | Dr.Bob's Webshop |
| |||||||
A year ago Inprise released JBuilder 2. And that was a great improvement over version 1, and JBuilder 2 truly made programming Java applications easy. Now Borland.com is about to release a new version of JBuilder: JBuilder 3. Here we will show a sneak peak at some of the new features in JBuilder 3, that will make our programming life even easier.
Yes, the help viewer is now visible in the taskbar as a separate application and we can use Alt-TAB to switch between the help viewer and JBuilder 3!
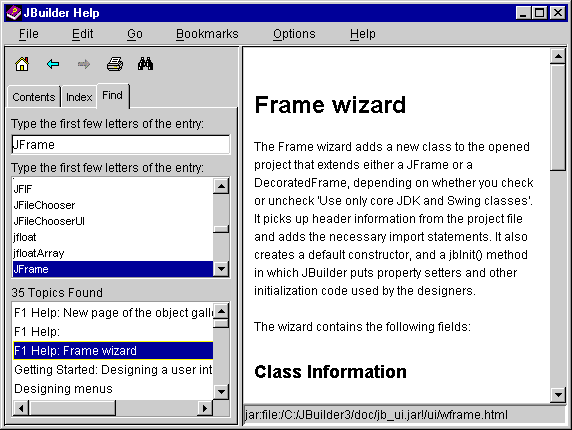
We can now do full text search and when we search for a keyword and multiple topics are returned as a result, these topics are no longer shown in a dialog window, but are listed in the help window.
The following screenshot shows the result when we search for the keyword JFrame:
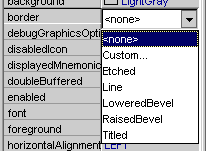
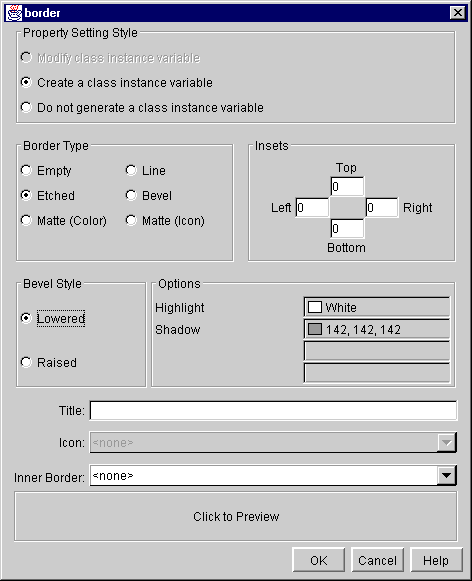
But if we choose the Custom... options, JBuilder 3 opens a new dialog where we can create a new border object:
If we wanted to use images / icons in our Java applications, we had to keep some things in mind. One of them being not setting the icon property in the Visual Designer, because this would put JBuilder 2 on the spot. JBuilder 3 has resolved this issue, and now fully support the setting of the icon property:
And the result will be immediately visible in the Visual Designer:
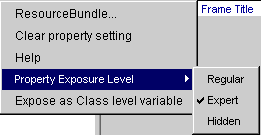
By setting the exposure level we can customize the number of properties we want to be visible in the Object Inspector.
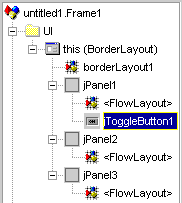
and start dragging the component to the jPanel3 component, because we want it to be placed on that panel:
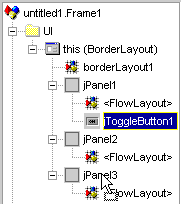
and when we release the mouse button, jToggleButton1 is placed on jPanel3:

This will definitely speed up our development process, because we don't have to use the Cut, Copy, Paste commands.

When we press the button, a standard package browser dialog will open. Here we can look for the component and select it. Our selected component will now be quickly accessible from the BeanChooser button as a drop-down menu option. The following screenshot shows the result after we added the java.awt.Choice component with the BeanChooser:

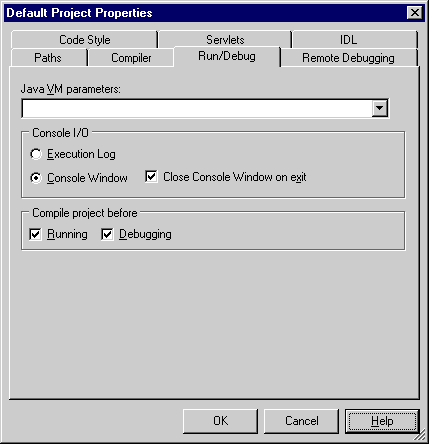
In the Console I/O section we now can see an option called Close Console Window on exit. And we can check or uncheck this option just as we like. If the option isn't checked the console window will stay open even after the Java application has finished executing.
It turns out that this feature is available for true console-only applications only.
If we are working on something that has a GUI it won't work.
The feature was added, primarily, for programmers who are using true console-type programs (quite handy when learning Java programming, for example).
To truly have a console that sticks around in all cases would require a change in how java.exe works (and a big change in how the language is supposed to deal with "end of program" where main() falls out of scope).
JBuilder 3 just tricks it for console only apps and the trick is overruled by anything with a GUI.